📂 projects/minimoog/
Minimoog synthesizer
One of my friends bought a huge kit of electric components in the freshman year of college to build an old Roland synthesizer for use in acid techno. I was confused at first as to why the kit would include all these ancient and rare electronic chips instead of state of the art technology that can do the same things. He then told me that the whole point is that the quality of the old chips is poorer, and thus gives your tones more character compared to modern technology. I didn't quite relate in how cool this difference was until a few years later when I stumbled across the Wendy Carlos synthesizer interview on YouTube. I don't know why it's so fascinating to me, but the small thermal drift that causes imperfections in the tone frequencies are so cool, and I knew I had to make my own synthesizer from scratch now.
Justification
What really got the ball rolling for this project was my recent purchase of a CNC mill, for making custom PCBs. Early on, I thought the process of making PCBs was some black magic involving electroplating, high power lasers, and otherwise expensive equipment I could never obtain. Well, I'm sure the commercial PCB manufacturers probably use those machines, but when I was thinking about making a CNC mill from scratch due to my brother's interest in converting a 3D printer into a CNC mill, I realized the potential to make homemade PCBs.
You see, you can purchase blank FR1 boards, which consist of a flat board of dielectric, wrapped in a copper sheet. With the help of a cheap AliExpress CNC mill, you can upload gcode to the mill, and have it carve out PCB traces on the copper layer no problem. Then for vias and through-hole components, you can drill fully through the board, and then jam resistor legs or something similar through them and solder both sides to connect the front and back.
And there you have it, homemade PCBs. For my mill, I was looking at a CNC mill on AliExpress and I was trying to justify purchasing it, but then my friend happened to find one on Facebook Marketplace that was already assembled, with an upgraded z-axis, bed, and bits for the same price as what was on AliExpress. The benefit of this too was that the seller indicated they purchased it for making PCBs in the first place, and had great success with it. Thus, a thirty minute detour and $250 later, I had the mill in my hands, and did some test engraving on wood, and it did well.
Voltage Controlled Oscillator
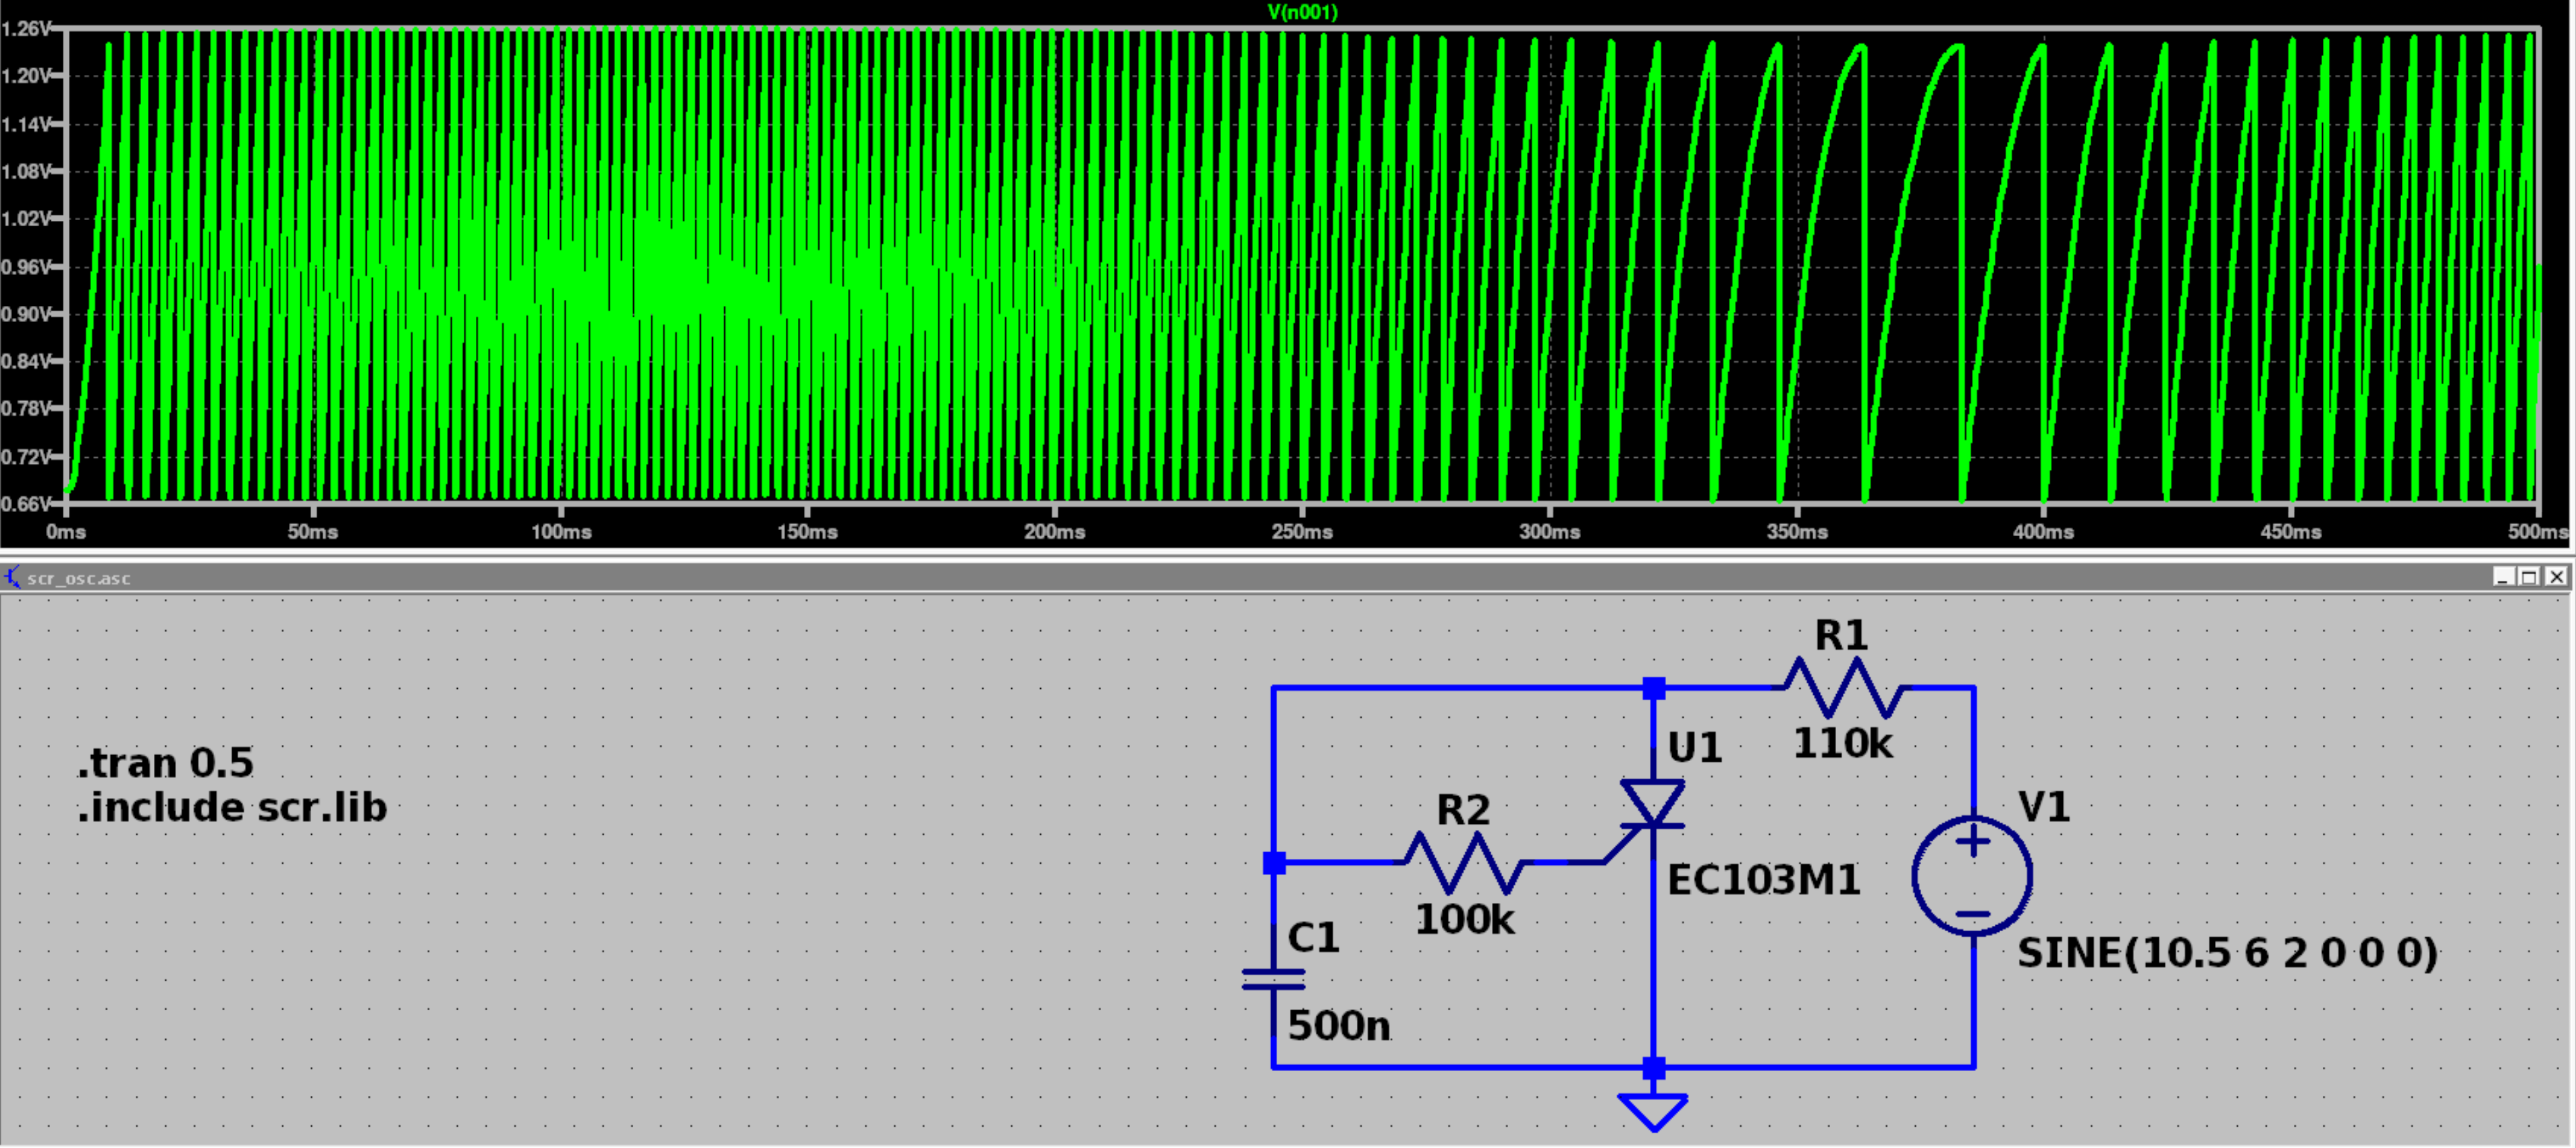
Anyways, with the justification out of the way, let's build the basics of a synthesizer, starting with a tone generator. This is usually done with a voltage-controlled oscillator, where an analog voltage will control the frequency of the oscillation. For simplicity, and for fun, I'm going to build a relaxation oscillator without the use of an opamp. I'm going to use the closest I can get to discrete components as I can. To accomplish this, I'm using an SCR for its simple PNPN structure that provides negative resistance when biased just right. Otherwise, I'm using a capacitor and resistor for the timing, and another resistor for controlling the gate bias current. It doesn't get much simpler than that. After playing with values in LTSpice, I think I should be able to have the voltage input control about two and a half octaves of frequency. That's certainly sufficient to make a bass voice, and a treble voice.
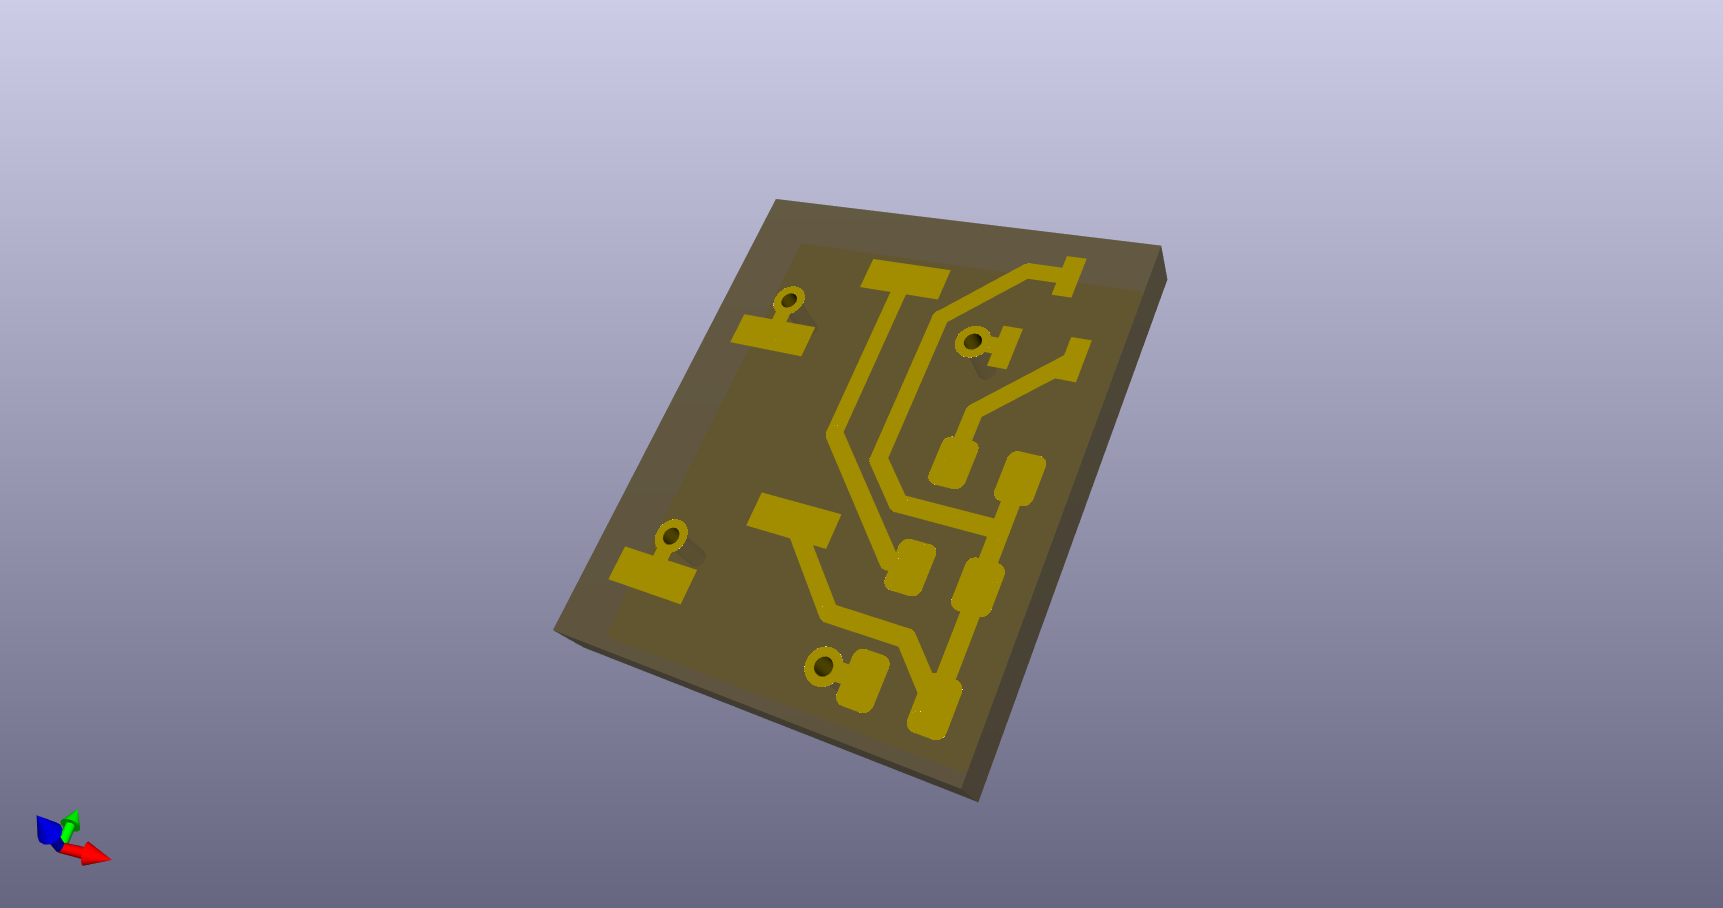
As of writing, I have not yet aquired the components to try to make a real version, but I've created the PCB on KiCad to test out my CNC mill, and I've got some cool LTSpice simulation stuff.