Concluding work on my software renderer
Why?
Because I can. Even if I'm reinventing the wheel, I found this productive because my knowledge of both low-level graphical programming and linear algebra have vastly improved. It's interesting, when I wrote the first renderer for Chocolate Engine, I had a very basic understanding of Vulkan. Then upon rewriting the renderer to fix a lot of issues with the first, I took a pause to work on this instead. Now that I'm done with this, my code I wrote for the second renderer already seems like it needs a new refactor. At the time of writing the second renderer, I thought I had a much better understanding of Vulkan. Sure, it was better than my understanding of the first renderer, but I'm at the point now where I can actually see some issues with the Vulkan API and wished some things were different (image formats for very specific use cases such as depth make me raise an eyebrow.)
The inspiration for this project came from when I was introduced by my brother to a programmer by the name of Bisqwit. In particular, I stumbled upon his software renderer tutorial series, and quickly tried to absorb as much of the information as I could. Sure, there were many elements omitted from his videos that I had trouble following along because of, but I found his explanations to be significantly better than others on YouTube.
What I liked about this project as opposed to writing a Vulkan implementation is the prerequisite to actually know what you're doing, and the fact that debugging render operations is more straightforward.
The progress
The tale of how this renderer came to be is fuzzy in my head, but looking through a lot of screenshots I posted as I was developing it tells the story.

Here, it looks like I was initially trying to get screen presentation to work. For a test, I hardcoded a 2D triangle to be rendered, and it didn't work out too well at first it seems. I'm using the same algorithm Bisqwit mentioned in his video series, where instead of using mathematical equations to determine if a pixel is within a triangle, we turn the edges of the triangles in to cartesian lines. This way, texture mapping and other interpolated values will be easier to implement.
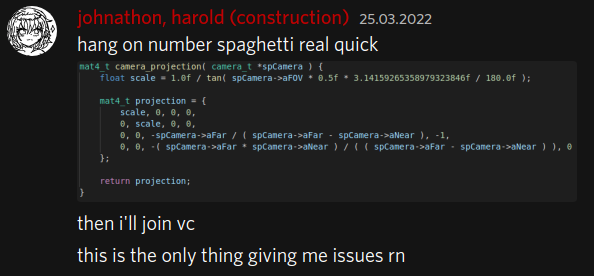
At this point, I must've been googling projection matrices to paste into my program until something worked. Something eventually did work. For those unfamiliar, when we multiply this matrix by our triangle vertices, the result will contain the positions on the screen to draw the vertices, converting 3D to 2D.
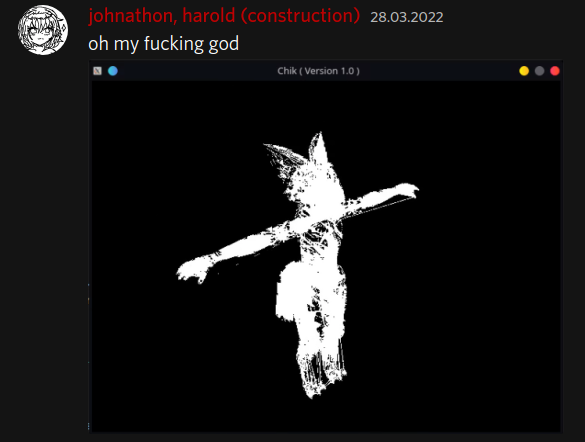
It would appear I was playing with loading OBJ files which assemble our boring triangles into other shapes. In this case, my friend's furry VRChat model because it's what I had on hand.
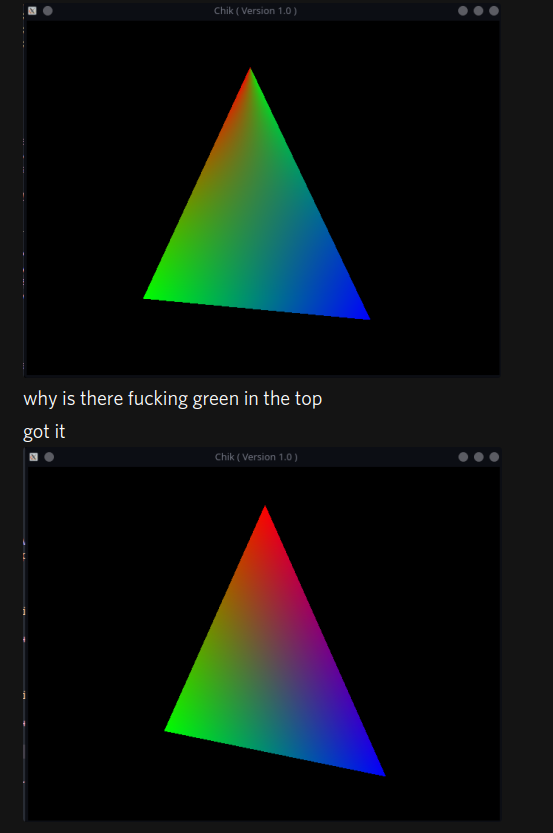
I was figuring out how to linearly interpolate vertex elements at this point using a simple vertex color. Poor me didn't know what journey was about to unfold when I had to throw a Z coordinate into that interpolation.

Why stop at colors when we can have images?
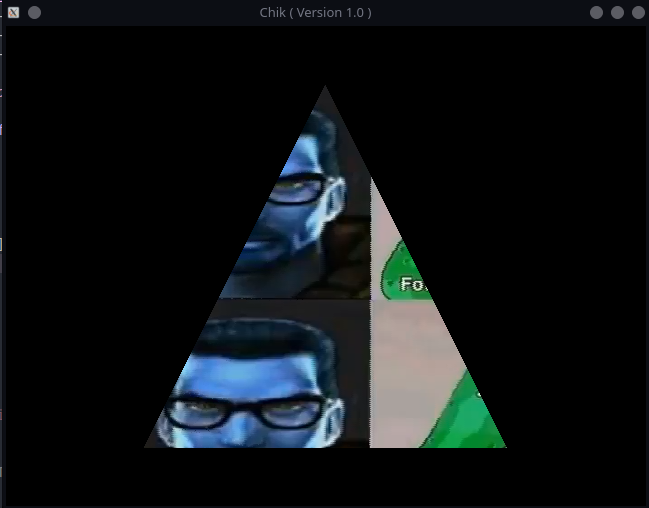
Gordon Freeman looks a little different.

Observant people will notice the time difference between this message and the previous. This is because I had to implement polygon clipping, which I had no linear algebra skills for. The concept seemed a little out of my reach, but I eventually gave it a shot. This was probably the worst thing to debug, not only because I have no linear algebra knowledge, but because the issues I ran into were unpredictable, and hard to get conditional breakpoints set up for. This algorithm basically works by looping through pairs of vertices, creating a vector, and doing some math to find if and where it intersects with a frustum plane. Oops, I forgot to mention that I had trouble setting up the view frustum as well because the projection matrix I settled on uses reverse depth which caused a whole new host of issues. With the clipping algorithm complete, looking around in the software renderer worked just like any other renderer. Previously, if parts of the triangle moved behind the camera, they would still project to screen coordinates, ruining the geometry of the triangle.
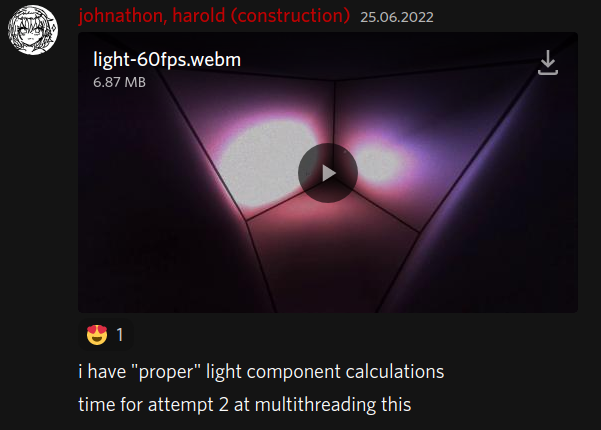
With the painful stuff out of the way, I was able to play around with adding very basic lighting. Here's the point where I knew this project succeeded, because this arguably looks more impressive than scenes rendered in my game engine.
And this marks the end of any major changes I will make to the software renderer. After this screenshot, I did a few quality of life changes such as an entity system on the game code side so making lights move around the scene would be easier. Aside from general code cleanup, I added a Z-buffer, but it was such a quick implementation so I don't really have any words on that. Multithreading this revealed that I'd have to change the structure quite a bit, so I've held off on that. My final change would probably be to clean up the input code to be less janky, but that's not even a software renderer thing anymore.
Conclusion
The source code for the renderer can be found on my Github. I'll have builds for other platforms soon as there are assets used in the video that are not included in the repo. If you've got a very strong single-core CPU, I'd love to hear how this runs on your system. On mine, any 1080p render I do usually runs around 5-6 fps, so in video editing, I speed it up 1200% to make it look smooth for when I'm showing others. At a crisp 240x135, I can get a full 144 fps and the demo becomes very playable. Speaking of demos, a way I'd like to wrap up is by showing one of these renders. I made a quick kinematics implementation to smooth out the movement so I can make a nice looking demo of the software renderer for YouTube with some relaxing music in the background.